3d Book Cover Mockups Photoshop
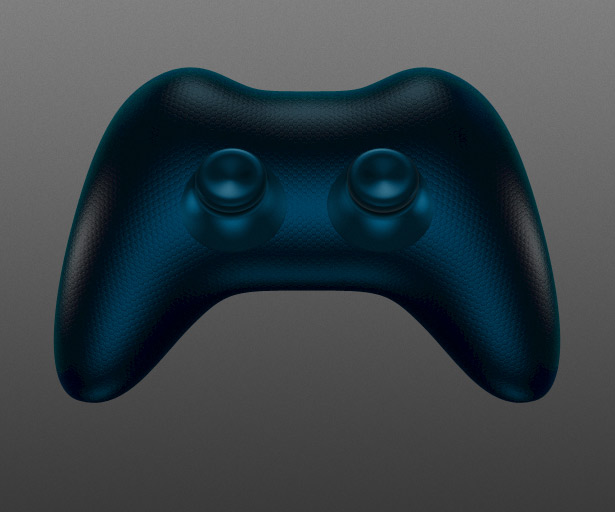
Create a 3D gamepad icon with Photoshop and Illustrator
Have you ever wanted to use that 3D tool in Photoshop to generate pro-quality images, and not just for experimenting? Do you know that 100% vector 3D images are easy to create and render right inside your everyday image editor? In this tutorial we're going to the edge. We'll minimise the routine part - the whole process requires only five simple hand-drawn shapes, and all the routine stuff is automated. Perfect shading, textures, lights and perspective - all done by Photoshop and Illustrator. We'll minimise the time - this icon can be rendered in just about an hour. And we'll maximise the quality - you just can't go wrong with perspective or shading here!
1. Start layout
Let's start with a 800x700 pixel Photoshop file in RGB, with some gray gradient for a background and a bit of noise. You also can create additional black fill and white fill layers to quickly test your icon on different backgrounds.
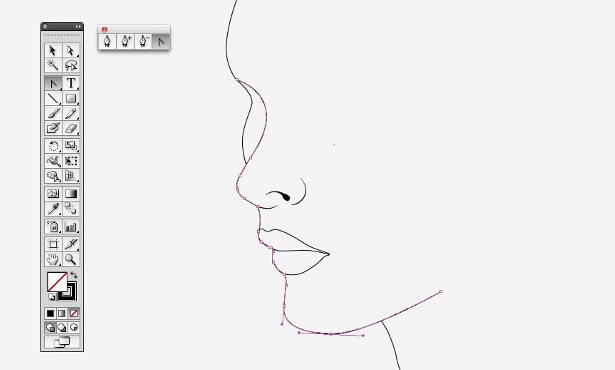
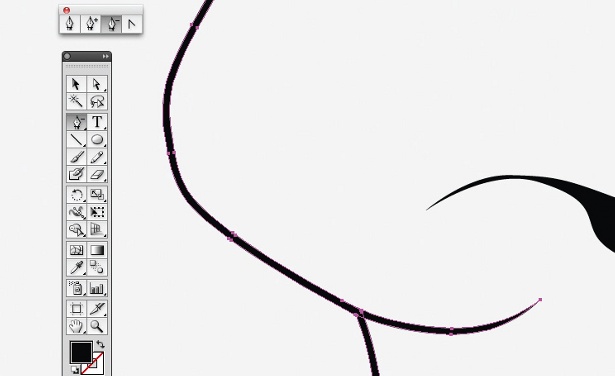
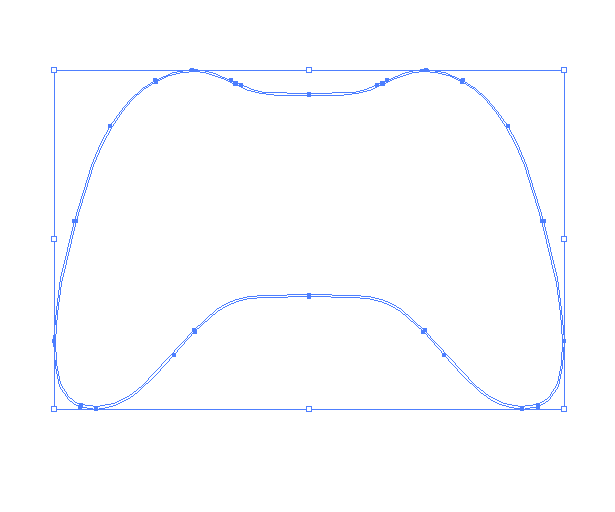
2. Gamepad shape
Using a Pen tool draw one half of your gamepad. Try to use as few points as possible. Than just copy and paste this shape, and do Transform > Flip Horizontal. Align both halves so they form a perfect shape. You should overlap the shapes to avoid holes between them. And don't forget to back up your shape layers!
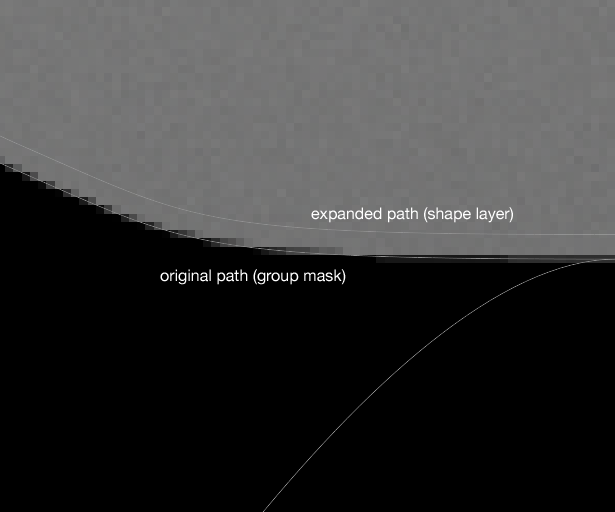
3. Expand the shape
We need some Illustrator magic here. Combine these two halves in one shape, copy it, and paste in an Illustrator document. Do the Object > Path > Offset Path command (2 pixels offset).
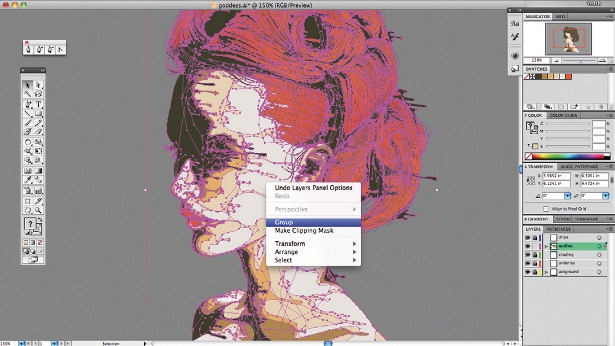
4. Group the shape
Copy the new expanded path and again paste it in Photoshop (as a path). Group the shape layer. Use the original (not expanded) shape as a group mask (Alt + drag the mask to the group). So you should have your expanded shape layer inside the group with the original path as a mask.
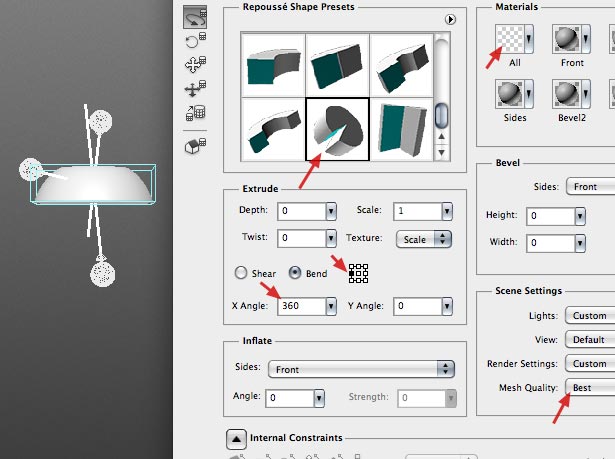
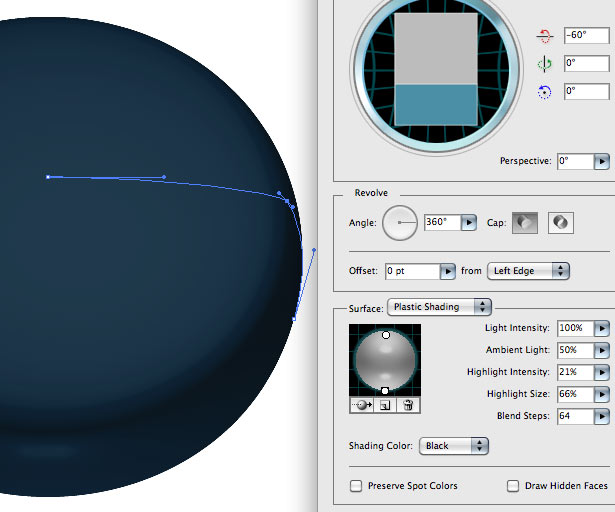
5. 3D gamepad body
With you shape layer selected click 3D > Repouss > Layer Mask. Select default blank texture for all materials and Inflate Sides for Repouss Shape Preset. Don't forget to select Mesh Quality >Best in Scene Settings, and click OK.

6. Smooth 3D shape
And here's why you need these masks. As you can see, default 3D render in Photoshop leaves aliased shapes, so we can use vector mask to make it nice and smooth again. For sure you can use high quality render mode, but it is very slow.
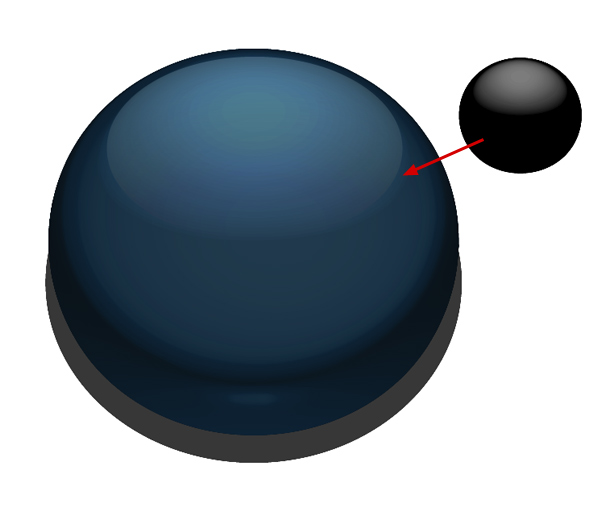
7. Material colour
Change the Front Inflation Material to something like this: dark-blue Diffuse color, 100% Gloss, 65% Shine and cyan color for ambient. You can check the exact colour values in the attached PSD file, but you don't have to fine tune the colour now, you can do it later.
8. Lights setup
The next thing that determines the look of our 3D model is lightning. Here's my lights setup. It looks a bit complicated, but you just have to add a blue Infinite Lights for the main volume: one for the top, one for the bottom, and a couple of lights on the sides of the gamepad. I've also added a couple of Point Lights on the sides, to show the form better.
9. Lights
Here's what your model should look like. Remember that we build the base for our scene now, and you can tune it the way you like and get any result you want. Of course you can copy (Save Lights Preset command) my lights set up to experiment.
10. Texture
Let's add some tech texture. In the Material Settings window, add the New Texture for the Bump channel. Then double-click the newly-appeared Bump Texture to open it like a Smart Object.
11. Pattern
Change the document size to 512x512. Create simple cell pattern like this inside the document. You can use my pattern from the PSD attached, or create your own tech-looking pattern. You just should make your pattern strokes darker (but not black) than the background. Also try to make it seamless.

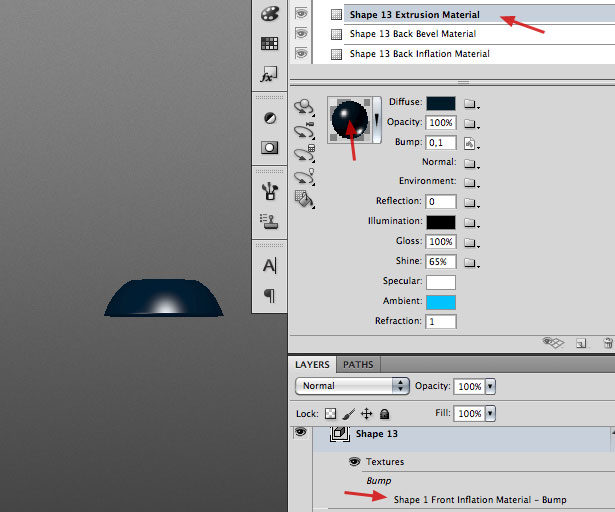
12. Bump map
Save and close the bump texture document. Your gamepad should update and show the bump texture applied. Looks ugly, but the texture follows the gamepad shape and reflects the actual lightning! Let's tune it. Set the Bump amount to something like 0,1 and click the Edit Properties command.
13. Fine tuning
Set the U Scale to 3 and V Scale to 2. Of course, you can change these numbers according to your idea and your bump texture. This way, Photoshop will tile the texture thus making it smaller. Note how a subtle texture can make the object look real and touchable.
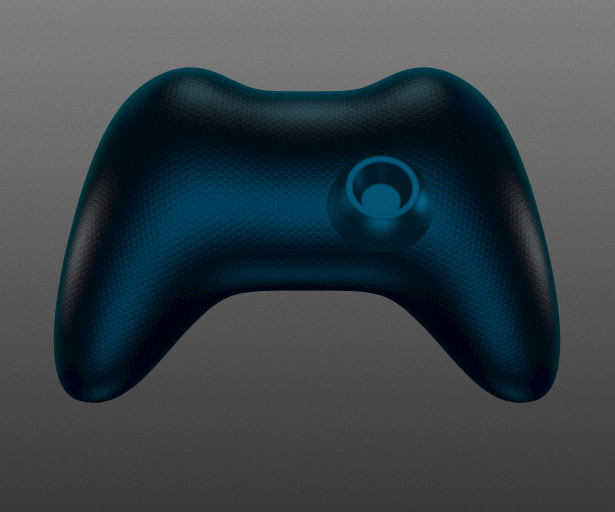
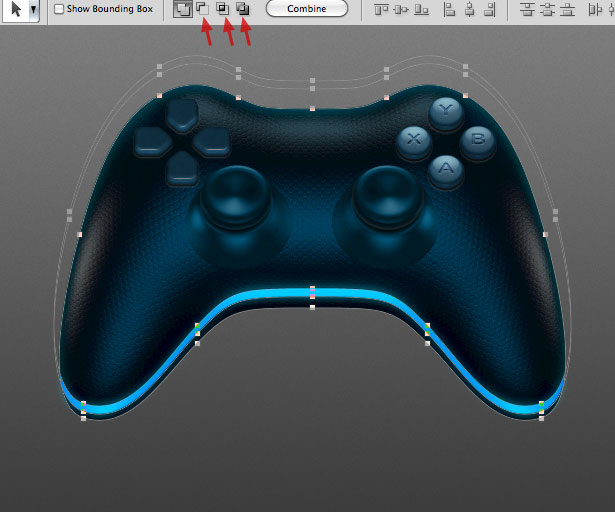
14. Layer style
And now the final touch for the gamepad body. Add some noise with the Pattern Overlay and a light-blue Inner Shadow via the Layer Style. If you still don't have a bunch of noise patterns in your Patterns Library, I highly recommend you to create some or take mine. Also add 2 pixels black stroke to the gamepad.
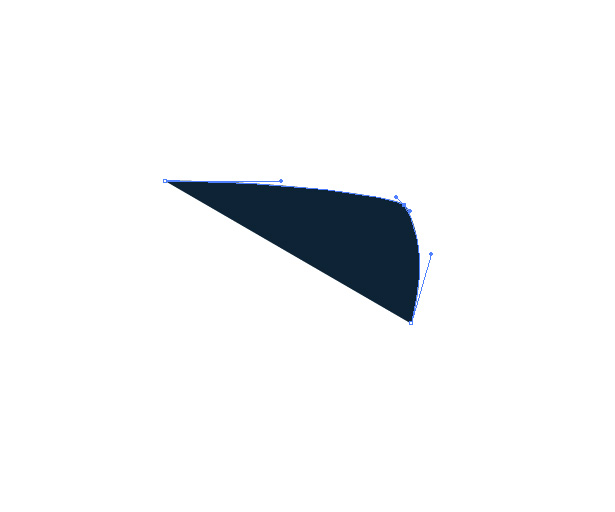
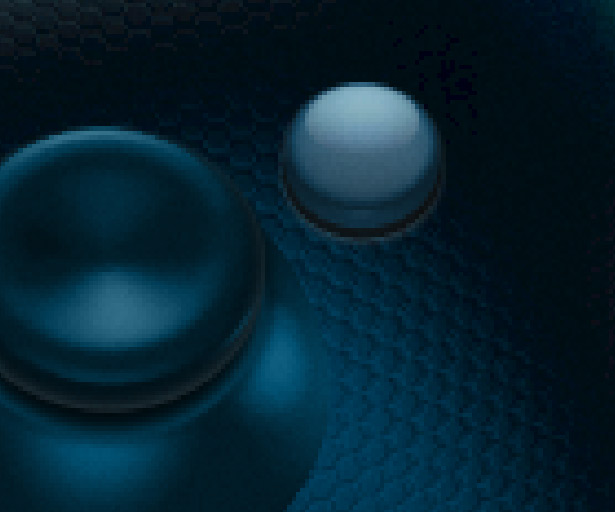
15. Analog stick jack
Using a Pen Tool, draw a simple vector shape like this. Try to align two left points horizontally (the same X coordinate). Back up the shape layer.
16. 3D
Again, click 3D > Repouss > Layer Mask. This time select another preset - one that revolves the shape. Set the anchor point to left-middle, X Angle to 360, any blank material for all surfaces and the Mesh Quality > Best.
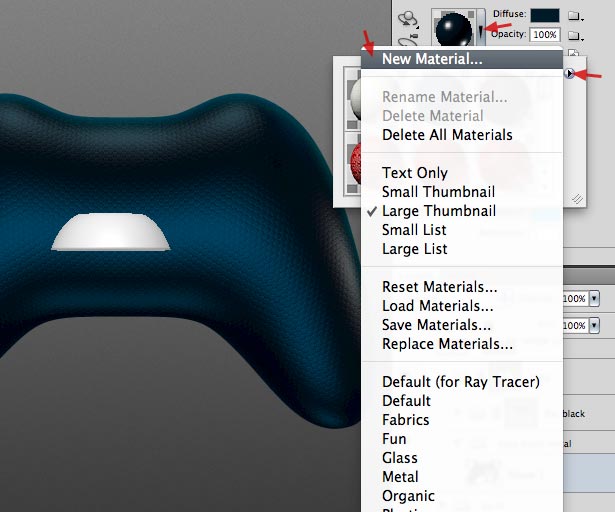
17. Saving the material
We need to reuse our blue material, so select the main body layer again, and in the Materials window, click the drop-down button next to the material sphere preview, then the small button on the right side of the materials list, then the New Material command. Name the material and save it.
18. Applying the material
If you haven't yet saved your lights, set up for the main body, do it now (Save Lights Preset command in the Lights list drop-down menu). Select your Analog Stick Jack 3D layer and apply the blue material (it's now in the materials spheres list) to the Extrusion Material. Turn off the bump map.
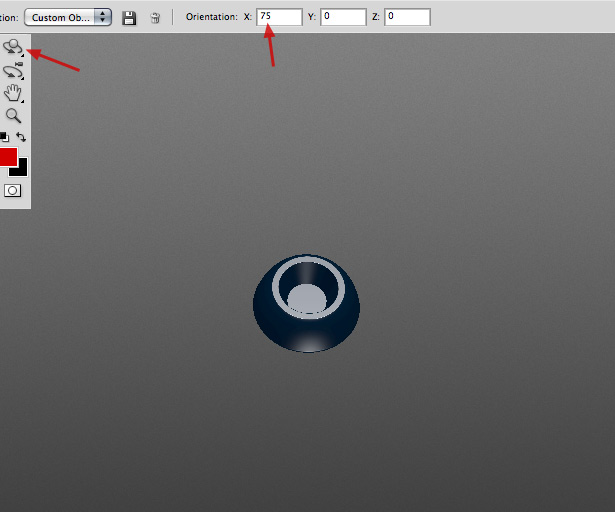
19. 3D to Smart Object
As you can see, we have ugly aliased borders here. We going to beat them with a little trick. First, rotate your 3D object as you want (like 75º rotation for X). If you don't like the model, tweak the shape layer and repeat the steps. And when you're happy with the model, convert the 3D layer to a Smart Object.
20. Applying the light
Let's continue our work inside the Smart Object. Before we remove the aliased edges, we need to add lights. In the 3D Lights palette, click the Replace Lights Presets command and select your previously saved light preset. Adjust it if needed (brightness, color, angle) and remove Point Lights if they look bad. I've also added one light to show the top face better.
21. Resizing the Smart Object
Still inside the Smart Object. Image > Trim > Transparent Pixels. Image > Image Size and make the document 10 times bigger. If you can't see your 3D layer after that here's the combo: with the 3D rotation tool selected, click the home icon. Then (if you still can't see the model), select the Move tool (V), arrow left, arrow right.
22. Anti-aliasing
Close with saving your Smart Object. You'll see the huge jack inside the main document. Just make it 10x smaller and you have 10x anti-aliasing. Plus, the 3D model inside the Smart Object updates pretty fast (unlike the high-quality rendering in Photoshop).

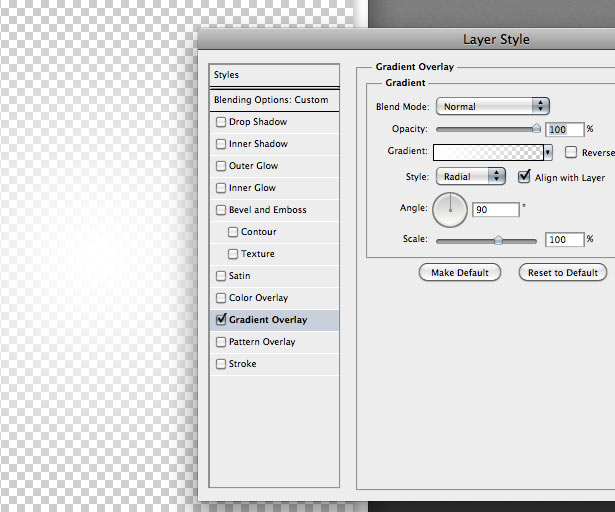
23. Adding a gradient
I use this trick very often. Create a new 512x512 empty (Transparent) document. Double-click the (single) layer. Add a radial white-to-transparency gradient. Don't forget to turn off the Transparency Shapes Layer check-mark off in the Blending Options tab.
24. Gradient as a Smart Object
Convert this layer to a Smart Object. Drop it to the main document. Make a copy of the layer and move it to some hidden group (for a backup). Now you have a white radial gradient that you can easily move, resize, warp and distort as you wish. Add a couple of highlights on the sides of the jack. Sure that's a small detail, but using this Smart Object now you can easily add highlights and shadows.

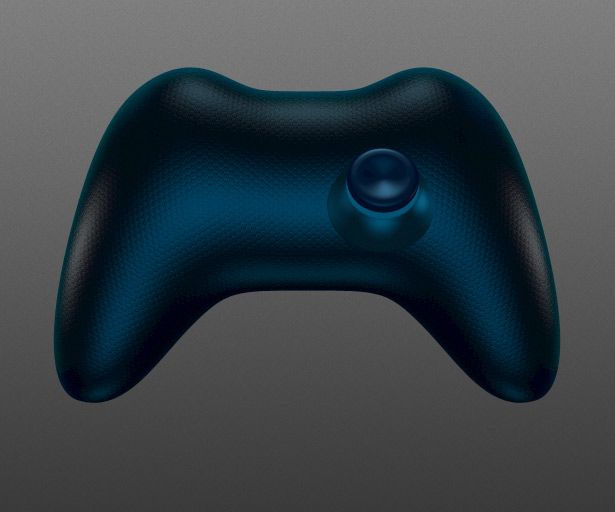
25. Final touches to the jack
Open the layer styles window. Add some noise with Pattern Overlay. Add Color Overlay in the Color or Hue mode just to better match the gamepad body colour. And the last thing, add the Surface Blur effect with small radius (1 or 2) and threshold around 30-35. This should just smooth the surface a bit to make it look less vector/3D.
26. Analog stick
Again, draw the shape like this and repeat the steps you did for the jack: revolve it with the Repouss tool, rotate a bit and convert the 3D model to a Smart Object.

27. Light, material and anit-aliasing
Continue to repeat the steps. Replace the light preset as you did before, assign the same blue material, remove all the transparent pixels around and make the Image Size 10 times bigger. If you're happy with the lightning and material, close and save the Smart object. Don't forget to make it 10 times smaller in your main document.
28. Final touches
Again, add some noise, Color Overlay, some light-blue Inner Shadow as a light going from the bottom, and black Drop Shadow. Don't forget to add a bit of Surface Blur. When you're happy with the look of the joystick, duplicate the whole group, flip it horizontally and place both the stick symmetrically.
29. A button
Now switch to Illustrator and draw a simple shape like this. Remember: use as few points as possible, and in this case use only Bzier (curvy) points. Click the Effect > 3D > Revolve command.
30. 3D
Set a simple 360º revolve with two light sources and 64 Blend Steps as shown here. If you don't see all this settings, click the More Options button. Don't forget to change the rotation angle to something like 60º and click OK. You can check my settings at the attached PSD as usual.
31. Details
Duplicate the 3D object in Illustrator and tune it to show the only one highlight on the black surface, set the blending to Color Dodge, and lower its opacity. This trick can make the 3D tuning a lot easier in Illustrator: you can control light sources independently. I've also added a semi-transparent black circle below and glossy high-light on top of the button.
32. Polishing the button
Copy the button and paste it in your PSD as a Smart Object. Adjust the size and position, and add some Layer Styles: white Drop Shadow (to show the chamfer), noise pattern overlay, colour or gradient overlay.
33. Four buttons
Add a text layer with the letter A, tune its Layer Style (transparency, white Drop Shadow, black Inner Shadow) to show the bevel. When you're happy with the look of the button, duplicate it three times, change positions and letters. Now you can easily tune the Vector Smart Object inside Illustrator and it will update all the four buttons.

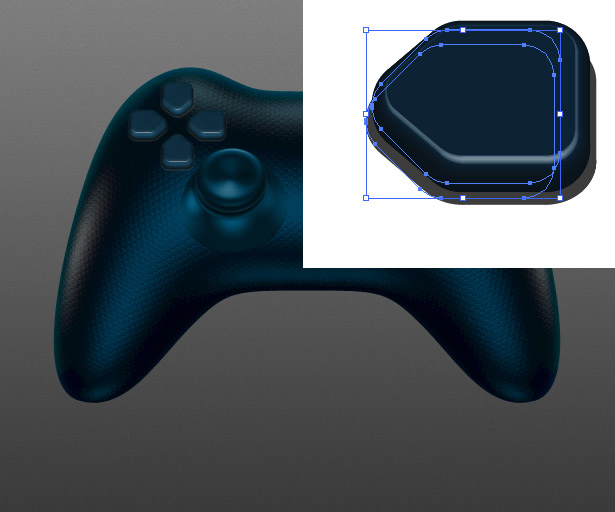
34. D-Pad button
In the Illustrator document, draw a shape like this, use the Object > Path > Offset Path command to add rounded corners. We're going to repeat this technique for the d-Pad button. But this time we're using the Extrude & Bevel effect instead of Revolve. Adjust lights and angle and copy and paste the button inside the Photoshop document.
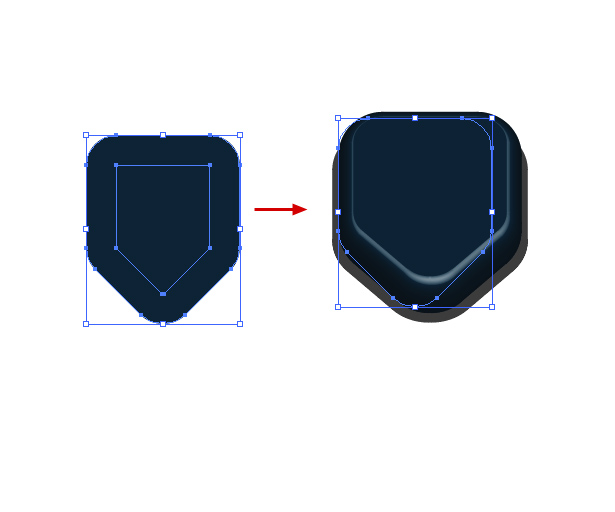
35. Polishing the button
As usual, add white drop shadow, noise and color overlay. You may also want to add light-blue Inner Shadow going from the bottom to better show the extrusion depth. Also add some Surface Blur to make the button look less vector. It is still vector by the way.
36. All four buttons
We can't just duplicate the Smart Object to make four buttons. Right-click the layer and select the New Smart Object via Copy command. Double-click it to open the Illustrator window and rotate the shapes itself so the extrusion goes down as it should. Repeat once again and set all the buttons at their places.
37. Glowing material
Let's add some glowing lines. Duplicate the main body 3D object and change its material to something light-blue, without any textures. Using different modes for shapes inside the layer vector mask create the shape like this, the glowing line.
38. More glowing parts
Repeat the steps to add one more line, maybe some logo or other indicators to make the icon look more interesting. Don't forget about some fancy Layer Styles like Inner Glow and Outer Glow.
39. Parts without the bump texture
Duplicate the main body again, turn off the bump texture for this layer and draw some shapes inside the layer's mask (don't forget to use proper modes). This will show the layer without the bump texture only around the controls, this way making them more connected to the body.
40. Shadow and light
Again, duplicate the main body, convert it to the Smart Object, change the layer's Fill to 0%, add some black gradient to its Layer Style and shrink it like this to make the shadow's shape. Now just add some blur effects to the layer to have the perfect shadow. Use a couple of white radial gradient Smart Objects with Color Overlay to add some glowing. Also I've added a simple black stroke to the gamepad.

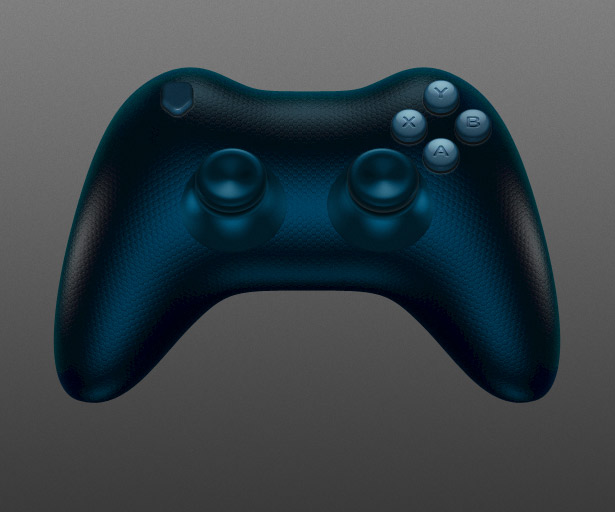
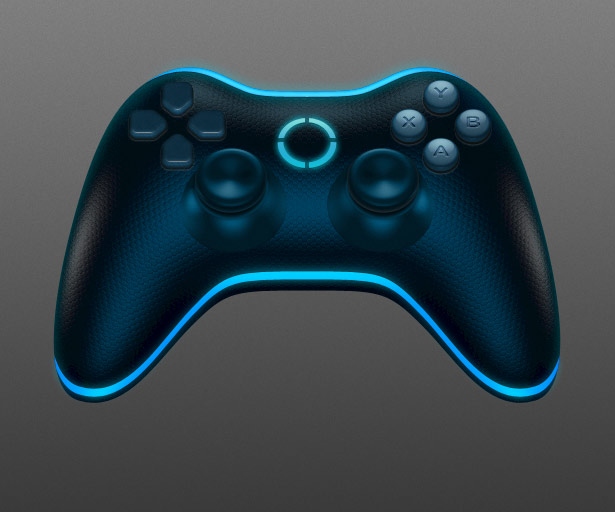
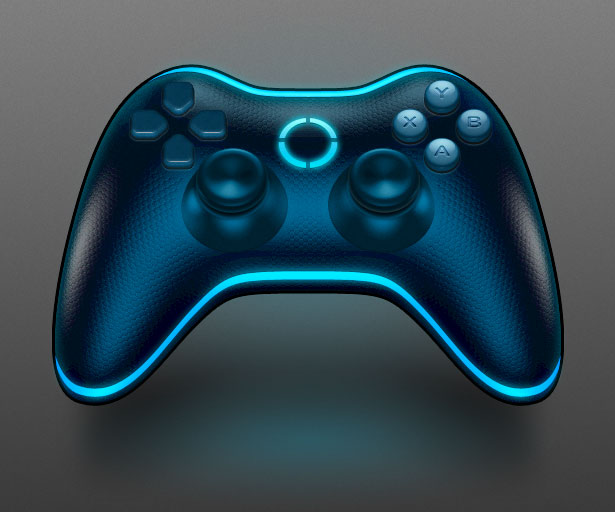
41. Final tuning
Don't forget that now our icon is fully customisable, you can tune it anyway to get the perfect result. Usually I add some Vibrance, Levels and Curves layers. Tune colours, texture, effects, shapes — everything you want. Here's my result:
Have a play around and I'd love to see what you come up with!
Related articles
3d Book Cover Mockups Photoshop
Source: https://www.creativebloq.com/3d/create-3d-gamepad-icon-photoshop-and-illustrator-10116718


0 komentar:
Posting Komentar